This week, I won the competition to be the new shoemaker at Upper Canada Village.

Image from Uppercanadavillage.com
This was Peter. We started together at the village 15 years ago. Funnily enough, we had also worked together the summer that he was 18 and I was 17 at another tourist site. I was a waitress at the Mount Airy Hotel in Ivy Lea (it has since burned down) and he was a deck hand on the 1000 island tour boats that left from the hotel dock. He made morning announcement fun, his wit was as quick as a bunny and he never failed interject with a quick joke. I had told him I wanted to be the next shoemaker and he said it would be a few years to retirement. I told him this was fine…it was going to take me a good while to get ready. I was expecting that I might have a chance to replace him in another couple of years when he retired, but sadly his wife came from work one day in the fall and he had died. This is definitely not how I wanted to become shoemaker, but it is the way it is, I guess.
To try to prepare myself to make make shoes, I went to the Art and Sole Academy in Toronto for a few courses starting three years ago.
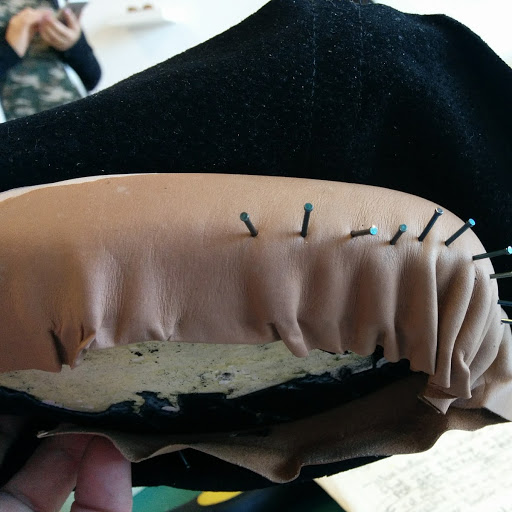
I made two pairs of shoes in two separate courses. I am not sure why I never posted about this at the time. I did put them on other social media.
-
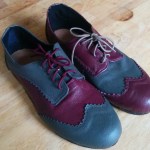
- Oxfords
-
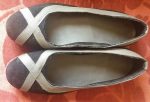
- Flats
Another part of the job will be harness making and repair. To do this, I took the Leather Tooling workshop. The book cover is sewn together in the same manner as horse harnesses.
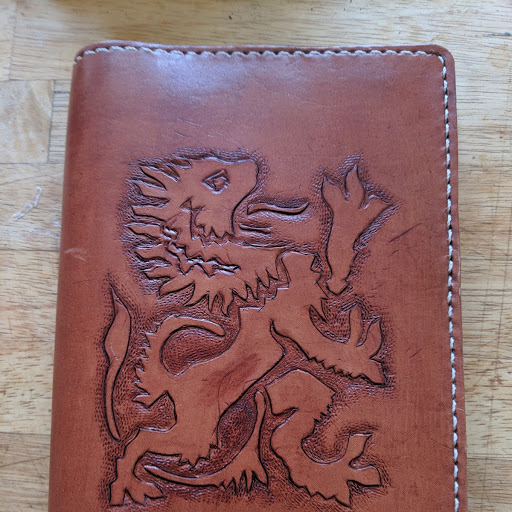
Rampant LIon
I am hoping to visit the Shoemaker at Old Sturbridge Village before our village opens to get some tips before I start, if my supervisor can arrange it with them. I am looking forward to my new position with equal parts of excitement and trepidation.