Tag Archives: Upper Canada Village

My one and only Raspberry Tart (till next year)

I managed to collect just enough raspberries this year for one pie. The bushes gave up their last raspberries on Friday, so I decided I better get baking or I would not be able to interpret the fact that I actually had raspberries for a pie.

Mary Eaton. 1823. The Cook and Housekeepers Complete and Universal Dictionary

This excerpt shows the two basic kinds of raspberry tarts of the time. I decided to go with the second option, a straight up raspberry tart with a lattice crust. I used my standard pie crust recipe. This was my first ever lattice crust and it probably shows. I had not realised before that a lattice crust takes exactly the same amount of crust as a regular top crust, just in a different configuration. I suppose if I had thought about it, I may have twigged. I think I will do smaller bars next time as it looks a bit clunky to me. I put the bake kettle on my favourite spot on the hearth, but as this pie shows, there is a high spot on one side and the filling spilled over on part of the pie. My guests were too polite to notice, I am sure.

My Raspberry Tart

Crust:
3/4 cup lard
2 cups flour
1 egg
enough cold water to make 3/4 cup

Cut lard into flour with two knives until things are not getting smaller. Rub quickly and lightly to the consistency of breadcrumbs. Beat the egg add water to make up to 3/4 cup. Use enough of the egg/water to make a rollable dough (usually about half).

Filling
5 cups raspberries
1/2 cup of sugar

Put in 1/2 of the raspberries into a bottom crust, add sugar, then the rest of the raspberries. Make a lattice top by slitting the top crust, then lay every other slat in place on top of the raspberries. Fold back every other slat and put the cross piece on, fold the slats back in place. Fold up the other slats and put the next piece on, etc.

Rumples…they are the best food

When my son was two, one day we asked him what he would like to eat. “Rumples”, he said, “they are the best food”. We asked what rumples were, all we got was “they have holes, they are the best food”. Eventually we realized he was asking for crumpets. I attempted crumpets this week using the griddle in conjunction with tin muffin rings. There are recipes for crumpets cooked in various ways in many historic cookbooks from our time period (1866) and before. Here is a description from the divine Mrs B. (Isabella Beeton, author of Beeton’s Book of Household Management…the Joy of Cooking of the 1860’s)
I am not sure Jacob would have thought my first attempt at crumpets produced the best food, but there you go. I think my batter may have been too thick, and maybe the muffin rings were too small in diameter and too tall to cook them properly. I think I may ask the blacksmith if he can make me iron ones which are shorter and larger in circumference for another go. Mrs. Beeton does call for iron rings, but we only had these ones, made by our tinsmith, on hand.

Crumpet Recipe

2 1/4 cups flour, sifted
3 tsp dry active yeast
1 1/2 cups warm milk
1 tsp sugar (n.b. not in Beeton…added to help the yeast)
1/3 cup warm water
1 tsp salt

Combine flour, yeast, milk and sugar. Beat for 3-4 minutes to develop the holes in the batter. Let sit covered in a warm place for 20 minutes to an hour until doubled. Stir the salt into the water, then stir both into the batter. Add more warm water if necessary to make a thick batter. Let rest in a warm place again for 20 minutes. Bake in rings on a hot griddle for 5-7 minutes per side.

How about a Singin’ Hinny for afternoon tea?

As you can probably guess, I am a sucker for a strange name. This recipe caught my eye in one of my new favourite books, Cakes Regional and Traditional by Julie Duff. This book contains a lot of recipes for griddle cakes, something I need to expand my repertoire of for the Tenant Farm at work. She has done a lot of historical research, so it is often easy to tell if they date back far enough (1866) for my purposes. If I think they do, I can go into the historic cookbooks and search for the refeence.
This page from the periodical, Notes and Queries, shows that the name Singing Hinny existed in February, 1866. Gotta love Google books and having a husband who is a trained librarian and can navigate his way through!

Singin’ Hinny Recipe

2 1/4 cups flour
1/2 tsp baking soda
1 tsp cream of tartar
1/2 tsp salt
3/8 cup butter
1/2 cup milk
1 cup currants or raisins

Sift dry ingredients together. Rub in butter. Stir in currants or raisins. Add milk and stir till just combined. Form into one large hinnie. Cook 7 minutes per side on griddle or until golden brown on each side.

I also made Sugar Biscuits this week with some time travellers, the overnight campers at the village who come for 5 nights at a time. Each morning pairs of them visit stations in the village for 1 1\2 hours to get a taste of what children their age (9-14) may have done in the 1860’s.

Cooking a chicken in the tin reflector oven

Our two main historic kitchens at the village are Loucks’ summer kitchen, with an 1800’s cookstove and the tenant farmhouse with an open hearth. Each day there is a dinner served around the noon hour in one historic kitchen. This takes place on Mondays, Wednesdays and Saturdays at the Loucks’ farm, where 6 people sit down to eat…two farmers, the cook and invited guests from around the village. On Tuesdays, Thursdays and Sundays, it is at the tenant farm with the cook, the tenant farmer and two guests eating. On Fridays, the meal takes place at Cook’s Tavern, also prepared on an open hearth. Six to eight people of the village are invited to have either soup in the cold weather or a cold bite in the warmer weather to demonstrate a tavern meal. If you are in a historic kitchen on a non meal day, you prepare an afternoon tea consisting of a historic dessert and a cup of tea. If you are preparing tea, you also make the meat and dessert for the meal the next day in your house. We arrive and set the fires at 9.30 in the morning, so preparing a full dinner from a standing start would be very challenging, and the choices quite limited. Yesterday, I prepared the meat and dessert for Sunday dinner at the tenant farm. I chose to cook a chicken in the tin reflector oven and a raisin pie in the bake kettle.
The first job in using the reflector oven (after giving it a good scrub) is to skewer the chicken on the spit. The spit has two holes in it to so you can put cross skewers through the chicken to hold it in place so it doesn’t just roll around on the spit. You then set the oven about 12 to 16 inches (30-40 cm) from the fire. You have to keep a pretty good fire going while you are cooking the meat and keep turning it every few minutes so it cooks evenly. They did have clock jacks which would turn the spit automatically, but the poor tenant farmers don’t own one, so it is a fully manual operation down there. I cooked it for 3 1/2 hours but it was probably done after 3. Horror of salmonella and all that…
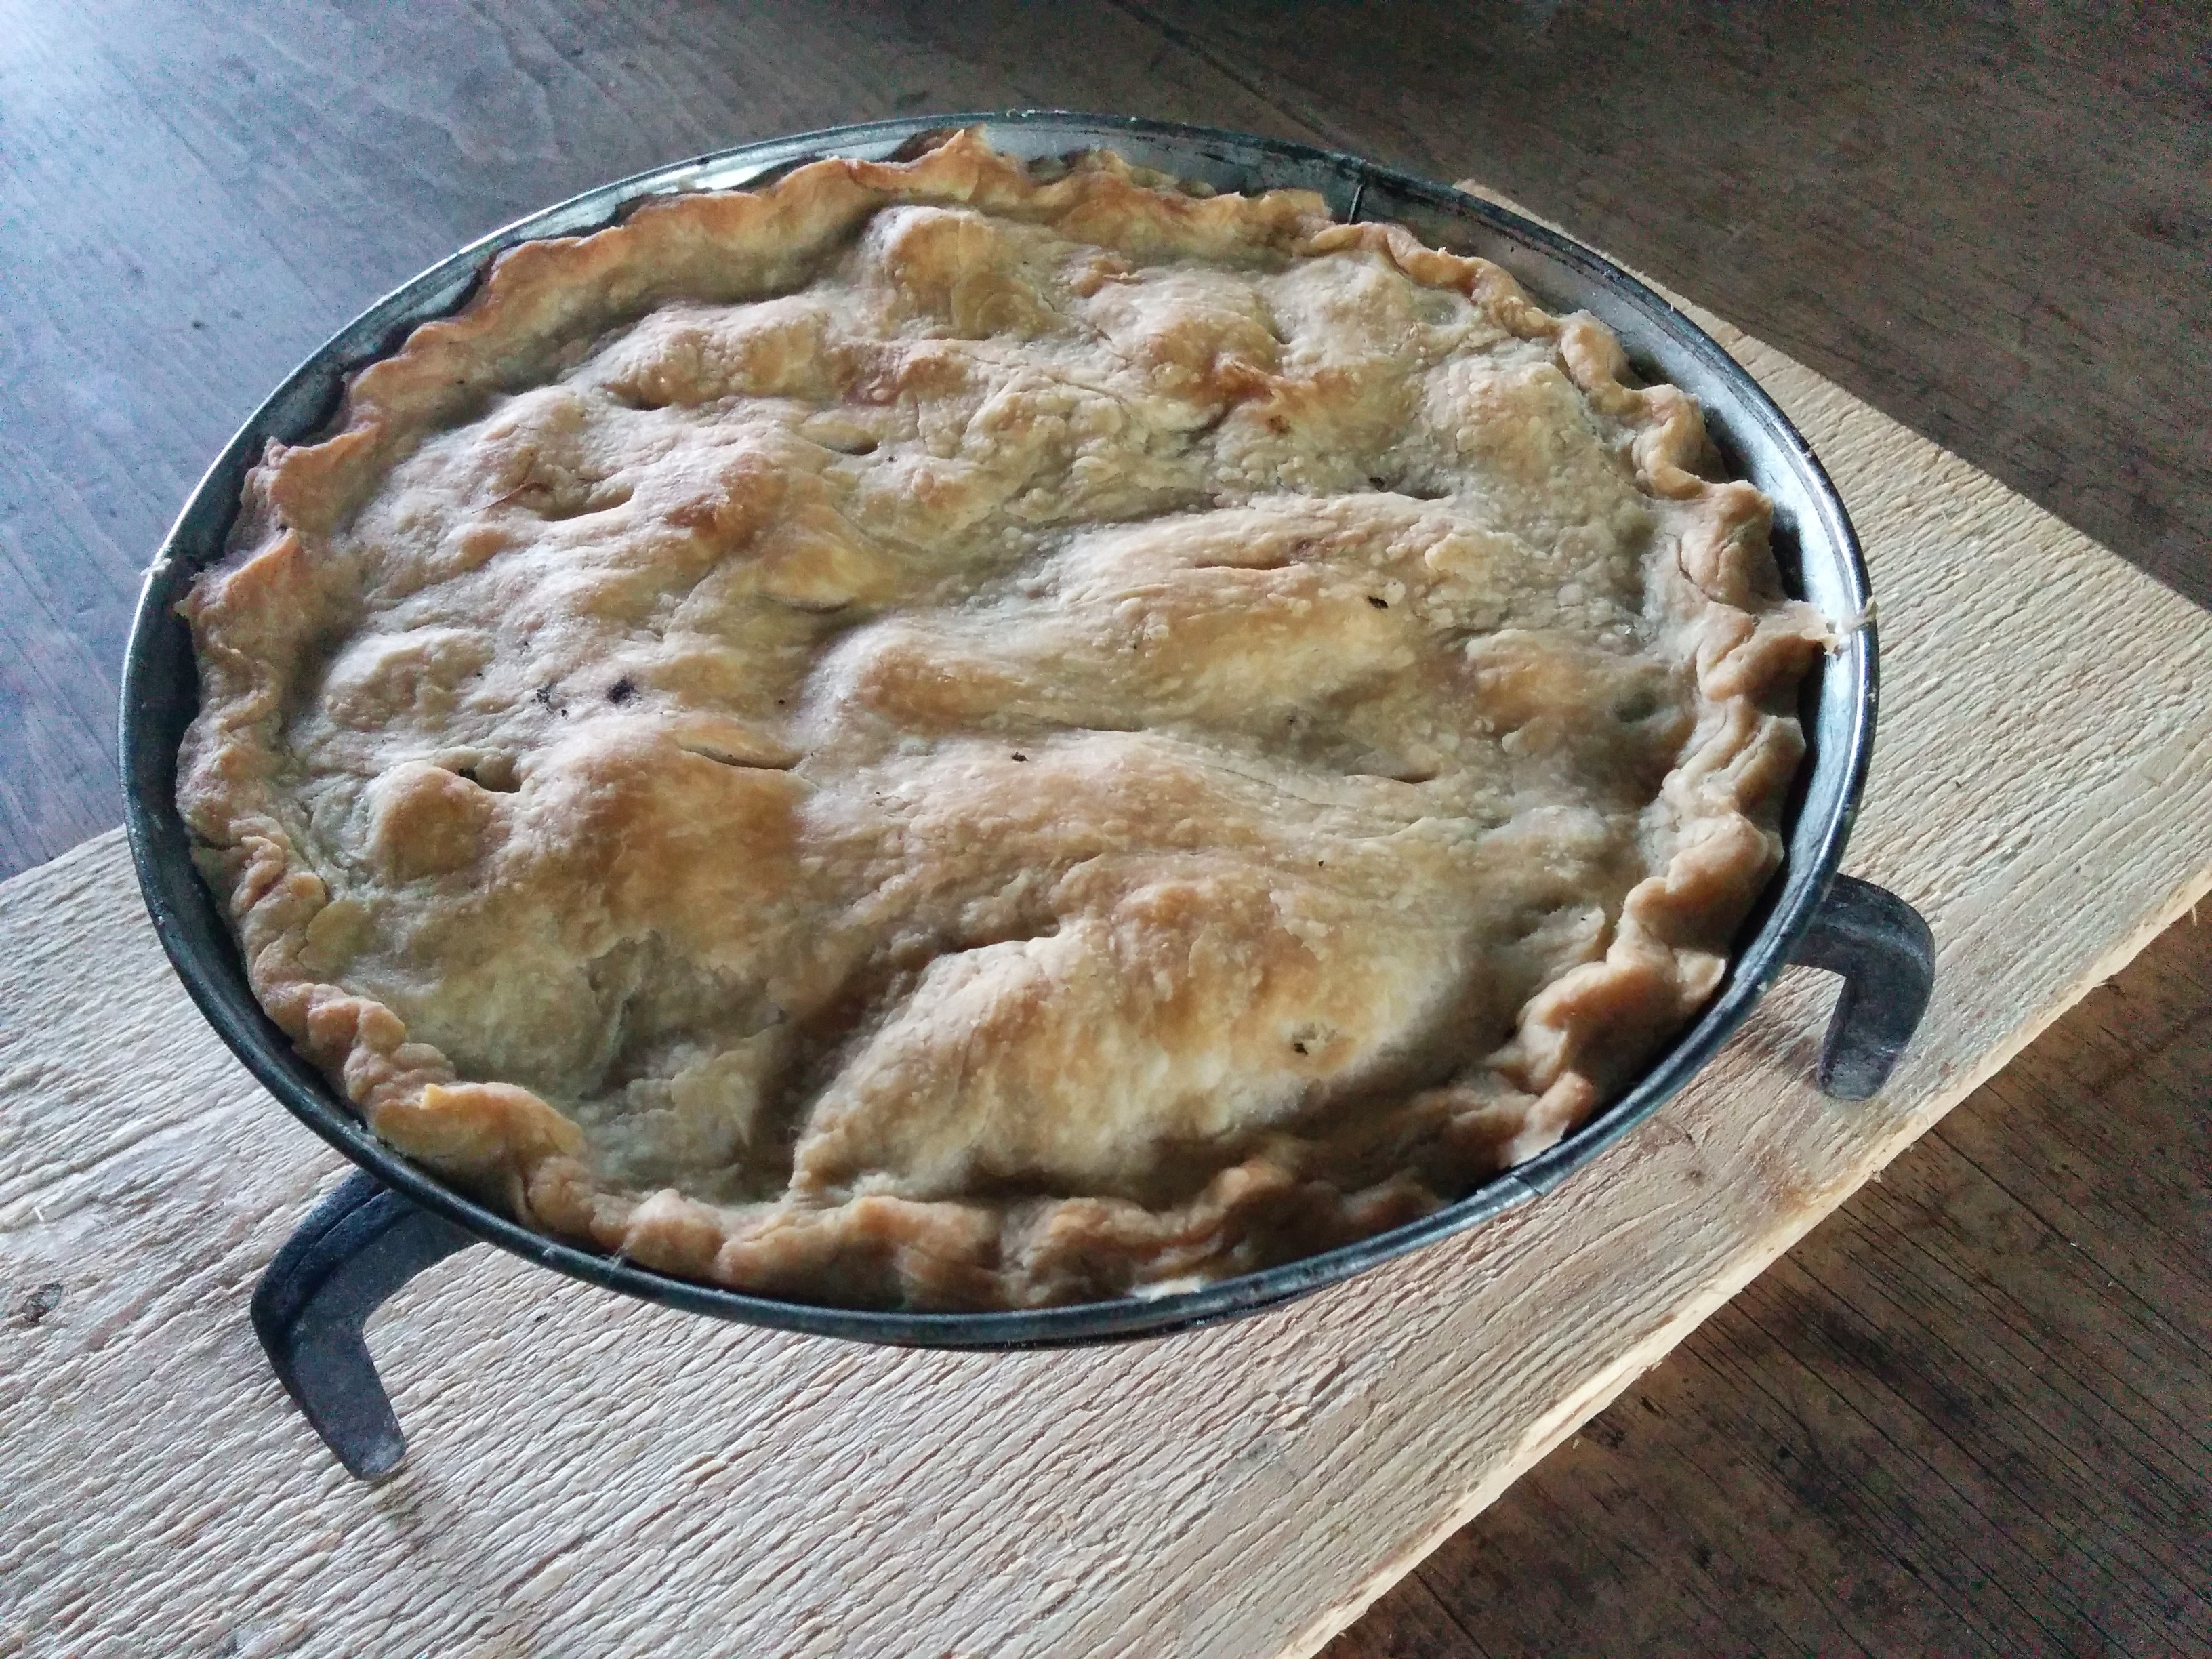
I also did a raisin pie in the bake kettle while the chicken was cooking.

Raisin Pie Filling

2 cups raisins
2 cups boiling water
1/2 cup brown sugar
2 tbsp cornstarch
1/2 tsp cinnamon
pinch of salt
1 tbsp vinegar
1 tbsp butter

Put raisins in a saucepan with the boiling water and boil for 5 minutes. In a seperate bowl, stir together brown sugar, cornstarch, cinnamon and salt. Add the dry mixture to the boiling raisins and cook 3 more minutes. Remove from the heat and stir in the vinegar and butter. Let the filling cool completely, then put it in a double pie crust and make a decorative pattern of holes in the top crust to let the filling vent as it cooks.
Bake 1/2 hour in the bake kettle or until crust looks done and the filling is piping hot. At home this would be about half an hour in a 350 oven.

Spotted Dick pudding with custard


Last week I talked about the bake kettle on the open hearth. This week I made a “Spotted Dick” boiled pudding on the cook stove. Our cabinet maker is from the Isle of Wight and he has been angling for one for a while. I looked it up and found that the name Spotted Dick was used by Alexis Soyer in his 1854 book “A Shilling Cookery Book for the People”. I am not sure when exactly the name was first used, but as long as it is before 1866, I am happy. The name dick refers to the dough, so the name means “spotted dough”, which is a pretty accurate description. If you look up modern recipes for Spotted Dick and the Newfoundland favourite, Figgy Duff, you end up finding exactly the same recipe for both within the top few hits. In this case, duff is the synonym of dough, and raisins are the poor mans figs, apparently. Soyer suggested serving it with butter and sugar, but I went for custard. It is the more common accompaniment today. I also substituted raisins for currants, mainly because we had them on hand. I just used a pudding bowl instead of a mould. A gill equals 1/2 cup.

At Upper Canada Village, we have a Forest Beauty wood fired cook stove made by the Findlay Stove Company of Carleton Place, Ontario. It is a mid 1880’s stove, a little younger than the time period of the village, but it was donated after being in constant use since the 1880’s with the stipulation that it had to continue to be used. It is a lovely stove, and I am getting better at using it over time. I think I mentioned this is my third season as a historic cook, so I am starting to settle in.

Custard Recipe:

2 cups milk
1/4 cup cornstarch
1/4 tsp salt
1/2 cup sugar
3 beaten egg yolks
2tsp butter
1 tsp vanilla

Combine milk, cornstarch, salt and sugar. Heat to bubbly. Temper in the egg yolks (i.e. take out a cup of the boiling mixture and add it slowly to the egg yolks to warm them up before putting them in or they will cook instantly when they hit the boiling mixture). Bring the mixture back to JUST boiling and stir in the butter and vanilla. Leave a top on the pot and stir it occasionally as it cools down to prevent a skin from forming. Serve warm or cold.

Breaking radio silence…

Wow, I knew it had been a while, but 3 months since my last post. Bad, bad blogger…

I have decided to do a bit about work this summer. I am getting more comfortable with my open hearth cooking, so I have actually been taking pictures in lulls between visitors of things I am happy with

Here are a few images from the last couple of weeks. We are, of course, only allowed to use ingredients that they could have reasonably had in the 1860’s on any given day. We only have strawberries and rhubarb in the garden at this point, so the set table shows my rhubarb pudding cake with fresh strawberries on top. I had a dinner this week with roast pork, mashed potatoes, and boiled carrots. I had leftovers of everything so I put them in a pie crust with some fried onions and made a shepherd’s pie for dinner the next day. On Friday, I invited my carpoolers for afternoon tea, so I decided to go the extra mile and make cinnamon buns. They are a bit of a fiddle because you have to make the sponge, then let them rise twice before baking. Not to mention the kneading…I just got them baked in time so they were warm. Needless to say, they were well received. I have also included a couple of pics of the hearth as things are baking in the bake kettle. Fire is hard to photograph because it’s beauty is in the licking flames.

Rhubarb Pudding Cake Recipe
Cake:
1 tbsp butter
1/2 cup sugar
1 cup flour
1 1/2 tsp baking powder
1/2 cup milk
1 cup finely chopped rhubarb
1/2 tsp vanilla
Sauce:
2/3 cup brown sugar
1 1/2 cups boiling water
3/4 tbsp butter
1 tsp vanilla
1 tsp cinnamon

Blend butter and sugar. Sift in flour and baking powder alternately with milk. Stir in rhubarb and vanilla. Put in greased 8 inch pan. Combine sauce ingredients and pour on top. Bake 30 minutes or until cake tests done. For a regular oven, 350 degrees should be about right.
This is like a French Canadian Pudding Chomeur. The sauce sinks through the cake as it bakes and becomes a sauce on the bottom, then you invert it to serve.

On a personal, proud mum front, my son Jacob just graduated with high honours from Engineering Science at U of Toronto.

And the Christmas season starts, Barbara

One hat…four sentiments


When I was thinking about doing this hat, I texted both of my kids and said “do you think f… xmas would be too much on a hat”. Within 15 seconds, Heather had responded with “nothing is too much…go big or go home” and Jacob had responded with “can I have the hat?”. His dad took him the hat on the weekend and was supposed to take a photo for this post. He, of course, forgot. I just asked Jake if he had the hat on him and could he send a selfie for the post. This is what I got:

my baby boy....thanks for the selfie....now where is your hat?

my baby boy….thanks for the selfie….now where is your hat?

For the knitters: This is a reversible hat which uses two stitches, Houndstooth Check, pg 90 and Shadow Check, pg 103. I put positive Christmas phrases on one side and much less positive phrases when you turn it inside out. Barbara Walker illustrated both sides of the shadow check together in the book. It is a lovely, bulky but not stiff stitch that works really well for a reversible hat. I cast on 100 stitches with a long tail cast on (n.b.110 may have been better), and did one row of purl before switching to knit for the lettering. I worked my way through the Bah! Humbug and F… Xmas side, putting Houndstooth Check in between the sets of lettering. I did one row of plain knit in red when I was finished. I then picked up a set of stitches from the cast on edge and worked my way up the nicer sentiments. I wasn’t particularly thrilled with the how the Houndstooth looked, so I just did a checkerboard instead on the second side. I put a knit row in red above this side too before I joined the two sides together. This avoids having the white purl bumps on one side. I continued up the hat in the shadow check. I used 5 points of decrease. I decreased 10 stitches around (slip one, k2tog, psso 5 times around) on every 6 row repeat until I only had 10 stitches left, then did k2tog around and finished off.

Village life…looking out my windows

I have been in a few different buildings in the last couple of weeks.  A couple of weeks ago we had the Queen’s birthday celebrations.  This picture was taken out of an upstairs window at Cooks Tavern where our village sedentary militia was assembled behind some visiting members of the Brockville Infantry and the Brockville Rifles.

Queen's Birthday

Queen’s Birthday

One thing that is GREAT for me this year is that my daughter, Heather got a summer student’s job at the village.  It is an hour drive in each direction and it is wonderful to have company and someone to drive half the time. She is regularly on the miniature train, but about once a week she is being put in my old building, the woollen mill.  She is obviously comfortable in there as she has known the guys for many years.  My best friend at the village, Lynda has also just replaced me for the summer in the mill. Here is Heather dressed for a day in the mill.  Her dad took these pictures as it would have been much too public for me to.

image (43)


image (42)


Last fall I did a temporary placement in the McDiarmid House, which is hand spinning and weaving.  I am now going to be doing a day in there now and then when the regular artisan is on her days off.  I was in there last week and I couldn’t resist going into the bedroom to take a picture of the young Brownies and Girl Guides as they trooped past.  No pun intended.  Really.

IMG_20150523_163119 (1)

I made my first (totally passable) rhubarb pie in the bake kettle with no one else around to help me.  I have used bake kettles before, but never without supervision.  I was surprised how well it went and how straightforward it seems to be.  Hopefully it wasn’t just beginners luck.

My first rhubarb pie

My first rhubarb pie…yeah!!!

The bake kettle

The bake kettle after use

A week in the life of the village-in drag

In drag for a day in the Grist mill

In drag for a day in the Grist mill

I have been moving around the village a bit, things are unsettled in the first couple of weeks as staff shifts around and new people get incorporated.  I had a visit to costuming so I could go into the flour mill in drag.  They had me outfitted in less than five minutes.  There is no real way to interpret around some positions as a woman, so we have to dress in men’s clothes once in a while and I spent that particular day in the grist mill.

costuming department

costuming department

Costuming is always busy in the mornings just before work.  They are standing by for mending, supplying hairpins, last minute re assignments that require special outfits, etc.  Later in the day they often have to outfit large groups of visitors that will be spending time on site in costume as part of their programs-overnight groups of school children and their teachers or girl guide troupes.  Later in the season they have to outfit the kids from the overnight camps.  Thirty kids a week with two complete outfits per child.  They also have a lot of work to do on special event weekends where regular staff need clothes representing people of a higher social class than they usually portray, and visiting extras need to be clothed in period costumes.

I enjoyed my day in the grist mill where they grind a hard, red Ontario spring wheat that is high in gluten and protein.  They produce flour for our on-site bakery and our gift shop as well as a few local bakeries who like the authentic stone ground flour our grist mill produces.  It makes REALLY good bread that usually sells out at our gift shop, sometimes within minutes.

Grist mill interior

Grist mill interior

I spent 4 days in my old job in the woollen mill, then moved into my new position in the cooking unit.  I am at the completely opposite end of the village this summer in the kitchens down on the farms.  I baked my first cake in the wood cook stove and thankfully, it turned out fine..nice and moist and not burned, which had been my fear.  This picture is before I added a brown sugar icing.

image (40)

A week in the life of the village–opening week

A few weeks ago, we set up the houses at work for the season.  Every year all the antiques are taken out of the buildings and stored for the winter.  The houses are cleaned top to bottom, the carpets rolled up and the furniture draped in protective tyvek.  We come back in the spring, clean again, return the antiques to their places and set everything up for the season.  I took a before and after shot of one room, sorry the after shot is a little overexposed.  This is the sitting room at the Loucks farmhouse.

....before

….before

...after

…after

On that same day a few weeks ago, I snapped a shot of the back street of the village just as everyone was leaving work.  It does NOT look like your typical 1860’s street scene!

...before

…before

Today, I left my building a few minutes early so I could get a shot from pretty much the same place of a few of the same people leaving work.  It looks a little different (as well it should!)

....after

….after

For this shot, I was standing just beside the rock in the picture above.  I remember once a few years ago when Alan drove me to work and I had stuff to move between buildings.  He was horrified when I made him drive through the village in a car.  I must admit, I like to walk round the village before work sometimes and the bucket lifts and pickup trucks do nothing to enhance the experience, let me tell you.  Luckily for the visitors, we do everything we can to help them have an authentic 1860’s experience during opening hours.